How to Identify Wiring
Service Panel
When you open an outlet, it can be useful to figure out the position of the outlet or switch in the circuit, as well as the function of each wire. This knowledge can help you pinpoint problems and connect wires to the correct terminals when making repairs.
If you can’t find the source of a problem with an outlet, work from that point back to the service panel, troubleshooting each load on the circuit and its connections until you locate the fault.
End-of-Run Outlet
When there’s only one cable entering an outlet box, it means the outlet is the last fixture on the circuit. Power comes from the service panel along the black (hot) wire through other outlets, switches, and light fixtures on the circuit and begins its return to the source through the white (neutral) wire attached to this outlet. The black wire attaches to a brass terminal; the white wire, to a silver terminal.
Middle-of-Run Outlet
Two cables entering an outlet box indicate that the outlet is not the last fixture on a circuit. One of the black wires receives power from the service panel; the other sends it on to other loads on the circuit. The white wires allow current passing through the outlet and the other loads on the circuit to return to the panel.
Electrical Wires
The black wire is the “hot” wire, which carries the electricity from the breaker panel into the switch or light source.
The white wire is the “neutral” wire, which takes any unused electricity and current and sends them back to the breaker panel.
The plain (or it can sometimes be green) wire is the “ground” wire, which will take electricity back to the breaker panel, then outside to a rod that’s buried in the ground. This is to prevent the electricity from running through you!
How to Trace Electrical Wiring in a Wall
If you need to find the wires inside your walls, you’ll probably want a non-invasive way to look for them. After all, without a method to your madness, you’d just be hammering unsightly holes through your drywall in a vain attempt to cross paths with your wires. Instead, there’s a better way: With the right tools and techniques, you can locate, or trace, your wiring without damaging your walls.
Tracing electrical wiring in walls can be tricky, and it involves more than just looking for the wires themselves. To figure out exactly where the wires are, you’ll look for the outlets and appliances that each wire connects to. You’ll also figure out which circuit breaker applies to which section of your home’s wiring.
You may be wondering why someone would go through all that trouble just to figure out the locations of wires. Knowing where your wires are can help you make repairs, plan for home improvement projects and even make your home safer. By knowing which outlets are on which circuits, you can decide where to plug in power-hungry appliances without overloading your electrical system. If one of your outlets is on the fritz and you don’t have an electrical blueprint of your home to use as a reference, tracing the wiring can help you figure out exactly where the problem is. If you want to run new wires to a home theater system or other electronics, knowing your current wires’ locations can help cut down on electrical interference, which can lower the quality of your picture and sound. And you’ll definitely need to know where the wires are if you plan to do any renovation or demolition projects to your inside walls. Breaking into a live wire could damage your home and cause serious injury.
Tips for Easier Home Electrical Wiring
Uncoil Cable Without Kinks
Pulling plastic-sheathed cable through holes in the framing is a lot easier if you straighten the cable out first. If you simply pull the cable from the center of the coil, it’ll kink as you pull it through the studs. The trick is to lift a handful of coils (four loops will reach about 12 ft.) from the center of the roll (left) and toss them across the floor as if you’re throwing a coiled rope. Next, walk along the length of cable, straightening it as you go (right). The electricians we talked to prefer this method because they can keep the cable contained in the plastic wrapper for easier handling and neater storage.
Pack Electrical Boxes Neatly
If you’ve done much wiring, we’re sure you’ve had times when you could barely push the switch or outlet into the box because there were so many wires. The solution is to arrange the wires neatly and then fold them carefully into the box. Here’s how to keep wires neat and compact: First, gather all the bare ground wires along with a long pigtail and connect them. Fold them into the back of the box, leaving the pigtail extended. Next, do the same for the neutral wires. If you’re connecting switches as shown here, you don’t need a neutral pigtail. Leave the hot wire extra long and fold it back and forth across the bottom of the electrical wire box. Put a wire connector cap on the hot wire to identify it. The neatly packed box makes it easy to identify the wires and leaves you plenty of room for the switches.
Remove Sheathing from Underground Feeder (UF) Cable
Underground feeder (UF) cable has a tough plastic sheathing that allows you to bury it directly in the ground without running it through a conduit (of course, it has to be buried deep enough to satisfy the electrical code). But that tough sheathing is also difficult to remove—unless you know this trick. Start by separating the black and white wires from the bare copper by grabbing each with pliers and twisting (top). They’re easy to tear apart once you get them started. Pull them apart until you have about a foot of separated wires. Next, remove the sheathing from the insulated wires by grabbing the end of the wire with one pliers and the sheathing with another pliers and working them apart. After you get the sheathing separated from the insulated wire at the top, just peel it off (bottom). Repeat the process to remove the sheathing from the black wire. Finally, cut off the loose sheathing with scissors or a knife.
No-Snag Fish Tape Connections
After going to all the trouble of working your fish tape to its destination, the last thing you want is to lose the cable or get your tape stuck on something inside the wall as you pull it back. Here’s how to avoid both problems. Start by stripping an 8-in. length of cable. Using a side cutters, cut off all but one wire. Cut at a steep angle to avoid a “shoulder” that could catch on something. Then bend the single wire around the loop on the end of the fish tape and wrap the whole works with electrical tape to form a smooth bundle. Now you can pull the wire without worrying that it might fall off, and the smooth lump won’t get snagged by or stuck on obstructions.
Check the Whole Wall Cavity With a Stud Finder
A decent stud finder is a must-have for every wire-fishing job, but don’t throw it back in your pouch after you’ve located the studs. Use your stud finder to check the whole wall cavity for obstacles like blocking and abandoned headers. You don’t want to find out the hard way that you should have fished your wire one stud cavity to the left or right.

All About Electrical Wiring Types, Sizes, and Installation
Electrical Disconnect Switches
An electrical disconnect switch provides a means to shut off the power to a home’s electrical system from an outdoor location. It is typically mounted below the electric meter, either on the side of a home or on the utility company’s power pole. Not all homes have a dedicated disconnect. They are commonly used when the service panel (which also serves as the main disconnect) is located indoors and therefore is not accessible to emergency responders or utility workers. Like electrical service panels, a disconnect must be installed by a licensed electrician.
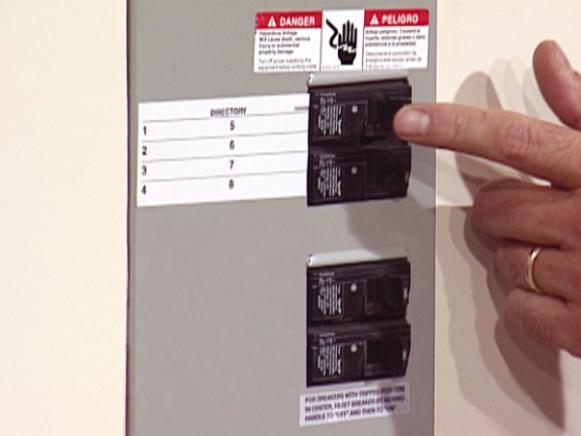
Wiring an Electrical Circuit Breaker Panel
The electrical panel, or service panel, is the power distribution point of a home electrical system. This is where all of the individual circuits of the house get their power and where they are protected by breakers or fuses. Wiring an electrical panel is a job for a licensed electrician, but DIYers should have a basic understanding of how a panel works and the critical role that breakers play in any system.
Maximum Number of Wires Allowed in Conduit
When running individual electrical wires inside conduit, there is a limit to how many wires are allowed. The maximum allowable number is known as the “fill capacity,” and this depends on several factors, including the size of the conduit, the gauge of the wires, and the conduit material. Metal (EMT), plastic (PVC), and flexible conduit all have different fill capacities, even when they’re nominally the same size.
How to Strip Electrical Wire
Stripping electrical wire involves removing the plastic insulation surrounding the wire’s metal core. It’s important to do this carefully so there is no damage to the metal. The procedure is simple but requires a special wire stripping tool and an understanding of how to use it. This is a critical skill—and tool—for DIYers to have for any wiring project.
Direct Burial Cable
Standard electrical cable is designed to be run indoors, where it stays dry and is protected by wall, ceiling, or floor structures. For outdoor projects or when running wiring underground, you must use direct burial cable, which can be installed underground with or without conduit (depending on local building code rules). With direct burial cable, the individual conducting wires are embedded in solid vinyl to fully protect them from moisture.
Essential Tips for Safe Electrical Repairs
Box and Clamp It
The National Electrical Code (NEC) requires that all wiring connections be made in an appropriate enclosure. In most cases, this means an electrical box. Enclosures not only protect the connections—and protect people from accidental contact with those connections—they also provide means for securing conductors (like electrical cables) and devices.
Respect Grounding and Polarization
Grounding and polarization are essential for the safety of modern electrical systems. Grounding provides a safe path for stray electrical current caused by a fault or other problem in a circuit. Polarization ensures that electrical current travels from the source along “hot” wires and returns to the source along neutral wires.
Make Tight Wiring Connections
Electricity travels along conductors, such as wires and the metal contacts of outlets and sockets. Tight connections between conductors create smooth transitions from one conductor to another. But loose connections act like speed bumps, restricting the flow and creating friction and heat. Very loose connections can lead to arcing, in which electricity jumps through the air from one conductor to another, creating tremendous heat.
Check Amperage Ratings
All electrical wiring and devices have an amperage, or amp, rating. This is the maximum amount of electrical current they can safely carry. Most standard household circuits are rated for 15 amps or 20 amps, while large-appliance circuits (such as for electric dryers and ranges) may be rated for 30, 40, 50 amps, or even more.
Test for Power
The best way to prevent electrical shock is to ALWAYS test wires and devices for power before working on them or near them. Simply shutting off the power isn’t good enough.