Choosing A Residential Painting

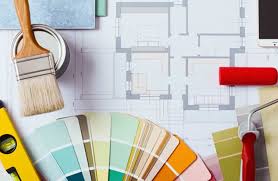
Things to Consider When Hiring a Painter

If you have owned a home for any length of time, you have probably need to hire a painter in the past.

If this is the first time getting you are house painted or your last experience with a painting contractors wasn’t the best of experience, we will discuss 7 things you should consider prior to hiring a painter for your next project.

Here are the top things to consider when hiring a painter:

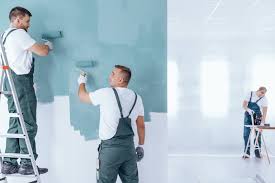
Check References and Past Work

One of the most important things to consider when hiring a painter is what other people are saying about what it is like to work with them. Online is a great place to start, but you should also call a few of their previous clients so you can see what it’s like working the painting company. Also ask if the painter can provide examples of recent projects to decide if their style matches the look you are going for. Once you’ve found the right painting contractor, move on to the next step: reviewing the house painting contract details.


Does the Contractor Have Insurance?

It might feel a bit strange, but put those feelings aside and confirm that your contractor has insurance before doing business with them. Remember that the contractor is working at your house or property. While you may have insurance to cover accidents that happen on your property, it is the contractor’s responsibility to have adequate insurance as well. Don’t hire a contractor unless they have comprehensive business liability with a minimum of a million dollar limit. This protects your property from damage by the contractor. Likewise, check that your contractor is also carrying workmen’s compensation to protect the workers while they’re on your property. This protects you from having liability for any accidents. Don’t rely on your homeowner’s insurance. Ask for proof of both insurances before agreeing to hire the contractor.

Is the Contractor Properly Licensed?

Some licenses are for only residential or only commercial properties. Others are for small jobs, but not big. Make sure your contractor carries the proper licensing for your property and the scope of your job. You can search for this online, and while you’re at it, check to see if the contractor has any unresolved complaints.


The Prep is Time Consuming

You may have considered how much time it would take you to paint your home, but have you taken into account all the work that must be done before you start the job? Professionals state that at least 30% of the total project time is dedicated to proper prep. Taking the time to do this step right will save you long term, from ensuring your exterior paint sticks to not having to deal with the messy clean up when it ends up where you don’t want it.

Being Ready Can be Cost-Effective

tIf you are hiring a professional for your house painting, don’t leave all of the prep work to them. Ensuring your home is ready to be painted can save your painter time and your money. If you have landscaping or hardscaping that is going to make it awkward to get to the house, clear it away. Ensure that the ground is clear for ladders and supplies, think at least 18 inches of space. Also, take this time to ensure that your gutters and downspouts are appropriately cleaned and attached.

Don’t Be Scared to Negotiate

Sometimes you love the expensive painters work way more than his competitor who is cheaper. Do not be afraid to tell the painter that! He may price match, or at least work with you to ensure that you get a quality home improvement for a price that wont make you struggle to afford your improved home. This is best done when you have two or three bids done, so you know what is reasonable when asking for discounts. The worst he can say is no.


Did they provide a formal estimate?

When getting an estimate did they provide you with a written or typed formal proposal? Before signing onto any project, there should be a clear understanding with the contractor as to exactly what services they will be providing (including the specific areas of your home they will be working on, agreed upon products, specific repairs to be done, etc.) and exactly what you, the customer, will be expected to pay.

Does the painter use employees or subcontractors?

In general, it is best to find a company that uses their own employees – these are men and women on their payroll who the employer knows well, trusts, and who operate in line with the company’s values.


Things Your House Painter Wishes You Knew

Take a deep breath. You have hired a professional house painter! Here are 13 things we want you to know and how you can help us do the best job possible.

House Painting Is Skilled Artwork

House painting is more than just brushing, rolling or spraying paint on a surface. Think of house painting as not just a skill, but also an art form practiced daily over years by your professional house painter. While this form of artistry will not turn your bathroom walls and ceilings into one of the world’s premiere masterpieces, like the Sistine Chapel, it is important to understand your house painter is a skilled artist.

Find a Painter You Like

Always go out for multiple bids for your painting project, not only does this give you an idea on what the average cost for your painting project will be, it also allows you to meet with the painting contractors to get a feel for them and their business. While price is important, it is very import to find a company you are comfortable working with, and if at first you don’t find a good fit, by all means ask for other painting companies to walk through your planned house painting project and give you a bid. Repeat until you find the RIGHT House Painter, at a fair price for the job

Compare the Specifics of Each Bid

It’s tough to over-emphasize the importance of hiring house painters that provide detailed bids. Deciding between two, three or more painting contractors is hard enough, and it is made more difficult if you’re relying on pure guesswork when it comes to the differences between the bids. For instance, a bid that is “scribbled down on a napkin” or that is generic with no details is not even comparable to a complete and detailed bid.

Estimate Flexibility

If you’re comparing two bids and you really do want the more expensive painter, but your budget just won’t allow it, ask the painting contractor if they can work with you to get the paint project in line with your budget. This could include changing some of the parameters of the painting project or asking for a discount to reduce the cost based.

Make A Good Ceiling For Your Living Room

How to Efficiently Install Ceiling Medallions

What Are Ceiling Medallions?

Ceiling medallions are decorative disks that are attached to the base of a ceiling lighting fixture. These ceiling additions are generally circular and  include floral patterns, flowing curves and other decorative features.

Originally (from the early 1700s through the early 1900s), ceiling medallions were used for mainly safety reasons as they protected ceilings from candle burns. They were especially loved by the Victorians who cherished a ceiling medallions deep relief patterns and detailed ornate features. While they were once used for practical purposes, today they serve a decorative role.  

Gather Tools and Equipment

Before you get to work, you’ll need to select a ceiling medallion that works with the room. Choose one that’s the right size compared to the total square footage of the space, ideally with a ratio of about 1-7. If you aren’t sure whether the medallion you’ve been eyeing will work with the space, try creating a paper or a cardboard cutout and testing it out in the room. The ceiling height can affect how well a medallion fits the space, so don’t hesitate to go bigger in a room with high ceilings.

Once you’ve decided on the perfect decorative element, take a few minutes to gather all the tools and equipment necessary for this DIY project. You’ll need the following:

What You Need

  • Polyurethane ceiling medallion
  • Wire nuts
  • Drill and large bit
  • Drywall saw
  • Sandpaper
  • Long threaded bolt (optional)
  • Paint for touch-up and finish
  • Adhesive caulk
  • Trim-head screws

Find out how to install a ceiling medallion in six simple steps.

Step 1: Remove and Clean

Shut off the power to the light that you’re removing and take down the fixture. Cover all wire ends with wire nuts. Thoroughly level and clean the ceiling where you will hang the medallion.

Step 2: Measure Medallion Hole

If your ceiling medallion doesn’t have a hole, you’ll need to create one for the light fixture. That hole will allow you to pull the light fixture’s electrical wiring through, but it should be small enough to hide the wiring. Measure the light fixture’s cover plate, and transfer that measurement to your medallion. Draw a second circle approximately 1/2 inch smaller inside the first circle. This is the hole you’ll to cut.

Step 3: Cut Medallion Hole

Using a large bit, drill a hole in the center of the medallion to provide access for the drywall saw. Insert the drywall saw into the drilled hole and cut along the small circle you just drew. Sand the hole edges smooth. Then check that the light fixture’s threaded bolt is long enough to reach past the ceiling medallion. Use a longer threaded bolt if it’s not.

Step 4: Prep Medallion

Paint or finish the medallion as desired. Apply adhesive caulk to the back of the ceiling medallion; center and attach to the ceiling.

Step 5 : Caulk Around the Medallion

After you’ve placed the medallion, you’ll need to touch up both the decorative element and the ceiling. First, apply a small amount of caulk on top of each screw, and allow the caulk to dry. Next, check for exposed areas between the ceiling and the medallion. If you noticed any, apply a bead of caulk all the way around the medallion to eliminate voids. Be sure to smooth the caulk after application. When the caulk over the screws has dried, paint over it to create a flawless surface on the face of the medallion. Use the paint to touch up any additional areas on the medallion or on the ceiling.

Step 6: Secure Light Fixture

Reattach the light fixture. Turn the power back on.

There is a common opinion that exists that ceiling medallions, as well as other decorative architectural elements in the room, have to be painted white. This point of view is not always correct. You should coordinate colors of the ceiling medallions and other decorative architectural embellishments with the overall color theme of the room.

If ceiling medallions are used in traditional decor, the details can be highlighted in a tone down paint, creating a subtle tone-on-tone effect. An interesting effect can be achieved on the ceiling medallions that are molded in deep relief using a “dry brush” technique when you go over base color with dry brash using deeper color.

If you want to achieve a bolder effect, you can highlight ceiling medallions design with gold, bronze, silver, or brass paint. If ceiling medallion is used along with a lighting fixture, the decision of the metallic paint choice should be based on the kind of finish metal part of the chandelier or other lighting fixture has.

Faux finishing of ceiling medallions and other architectural elements now is very popular. Ceiling medallions can be faux finished using an antiquing technique, or they can be finished to look like wood, stone, leather, or even fabric.

Ceiling Medallions Finishes

Verdigris

Metals such as bronze, copper, brass, steel, and lead naturally tarnish and corrode with time. Verdigris is an excellent finish for creating the illusion of distressed metal or oxidized copper. Faux verdigris imparts an aura of antiquity to architectural details and ceiling medallions. 

Applying this technique to a ceiling medallion is a great way to complement a chandelier or lantern which has this “rustic” detail applied or has naturally tarnished with time.

Metallic Finish

Allow this distinctive and fashionable finish to be the center of attention in any room. Using all architectural products, you can design and compliment a complete room using this bold technique. 

Make your job of finishing even more effortless by not having to worry about pre-treating or priming any of our ceiling medallions before you begin. This technique fits any style of decor, from contemporary to antique applique.

Stenciling

Stenciling offers a quick and simple way to add pattern to any painted surface. Apply decorative stencils to ceiling medallions to complement and accent any room. Precut stencils are available in myriad styles – the options range from traditional Early American to sophisticated to whimsical. 

With typical stenciling folk art form, you can match any of our architectural products. Tie your entire room together from your rug right through to your furniture.

Decoupage

Decoupage, derived from the French word “decouper,” meaning to cut out, is the creative art of pasting, assembling and varnishing paper cutouts for accenting objects.

Combine this wonderful detailing and whimsical finishing option with other methods to create an even more unique effect. The decoupage artist is limited only by his or her imagination.

Marbleizing

Faux marbling brings out the lavish details of the ceiling medallions. Create an elegant feel by marbleizing your ceiling medallions to match your floor or to create a conversation piece which draws the attention of your guests..

Marble is an intricate pattern stone. Re-creating it requires some skill and judgment but is not as challenging as you might think. Remember, base coats are easily applied directly to any of our ceiling medallions because of their pre-finished treatment..

How to Choose the Right Ceiling Medallion

Choosing the right ceiling medallion for your room involves considering both the size proportions and the decorating style of your room.

Sizing Considerations

When choosing a ceiling medallion for your home, numbers play an important role, since the proportions of the medallion must be in the proper ratio to the room size.

Here’s how to choose the correct size:

Measure the width and length of the room.

Multiply the numbers to get the square footage of the room.

Divide the number by 7. This number is the proper diameter in inches of your ceiling medallion.

This is not a hard and fast rule since the size of the light fixture also plays a role. Generally speaking, aim at sizing the medallion so it is roughly the same diameter as the chandelier. But in very ornate rooms with lots of trim moldings, the medallion can be larger in diameter than the chandelier. In smaller, plainer rooms, it’s appropriate to size the medallion so its diameter is less than that of the light fixture.

Style Considerations

While medallions are in general most appropriate for large, ornate rooms, within that general recommendation you have dozens of options—from simple disc medallions that are well-suited for Colonial-style homes to intricately shaped designs that work best in homes with the feel of an Italian villa or French chateau.

Designers usually recommend using the shape and style of other room elements to help guide your choice of ceiling medallion. Crown moldings and chair rail moldings, in particular, may give you clues as to the best patterns for a ceiling medallion. Remember that the medallion is an architectural feature and should be matched to the style of the room. If the other moldings or trim work in the room have identifiable motifs, try to match these in your ceiling medallion.