What Should You Look for in a Wedding Videographer?
You may have already decided you’d like to hire a wedding videographer, but there’s still a lot to think about. First, do you want to have your entire day captured on video, or just the ceremony? Are you hoping for a chronological look at your nuptials, or do you prefer a more cinematic film with different parts of the day all mixed together? With varying video styles, personality types, and working styles, you’ll want to be sure you’ve found a videographer who checks all of your boxes. But what exactly should you look for in the pro you choose?
Hire friendly photographers and videographers.
There is a lot to capture on your wedding
day in a short amount of time. Both your photographer and videographer will
film the same key scenes: getting ready, first look, ceremony, speeches,
reception, etc. Coordination is important, so try to hire a photographer
and videographer who have worked together before. This way, they will likely
have systems in place to make sure each captures those special moments. Ask
your wedding planner for recommendations or have your photographer to
suggest a videographer (or the other way around) for a seamless day-of
experience.
Find a filmmaker who is comfortable with
your venue type.
Found a filmmaker you love but notice that
all of their films take place outdoors and you’re getting married in a
ballroom? Raise the question to the filmmaker before you hire them and make
sure they’re comfortable shooting in your wedding
setting. Request sample films to watch and show them an example of a
film you like from your venue (or a similar) and confirm they’re comfortable
shooting in similar circumstances.
Understand what’s included in your
package.
As wedding films have increased in
popularity, so have the package options and the terminology. Understanding
everything that comes in your package will help ensure you aren’t
disappointed later. When your filmmaker sends you examples of what comes in
your package (Instagram teaser, trailer, full edit, etc.) make sure to really
watch each example and be sure it’s the type and amount of coverage you want!
Raw Footage: What is it?
Generally Raw Footage means “unedited
footage”. This can be quite useless to a couple because it will include
all the camera movements and sounds that are native to making a film.
When a documentary videographer edits the full ceremony, for example, he takes
all these unwanted aspects out and “edits” it in a more appealing way.
For example, the videographer will probably
have at least two cameras. One may be “locked off” on a tripod facing the crowd
or the altar etc and it will not move for the entire ceremony which could be an
hour long. However, this camera may not have any sound because the videographer
is using separate sound recorders which have to be synced in editing. The
second camera, the one in the videographers hands will have lots of undesirable
footage as he moves from one shot to another whether by re-framing (zooming) or
by physically moving.
What Is Their Final Product?
And the last but perhaps most important thing to know is what you should expect for a final product. Of course, you should always make sure to read every contract from your vendors extremely carefully, but that is especially true for something as important as wedding documentation. You need to know what type of video your videographer specializes in. Are they creating more of a feature film of your day with full edits, background music, voice overs, etc.? Are they doing a less-edited, more natural view of your event? Are they only providing you with one full-length film or are they also including a highlight reel for social media sharing? Most of these questions will be apparent in a sampling of their work that you should take time to watch before making your decision, but you can also ask them to describe their work themselves during a consultation.
PACKAGES
From Teasers to Full-Length Documentaries
Here are some of the most popular package
options you’re likely to see when hiring a videographer
Highlight Film (3-10 min) –
With many videographers, the highlight film is the final product you will
receive. More commonly, this film is non-linear and takes a more modern
approach, where the videographer has truly created a piece of cinematic art out
of the events and moments throughout your day.
Short Film (10-20 min) – If you
decide on a package with a short film, you will receive an edited version of
your wedding footage that takes a more linear form, often including a portion
of your vows, reception toasts, etc. Depending on how long you book your
videographer, the film may also include getting ready footage, first look
footage, and grand exit.
Same day edit (4-10 min) – Some
videographers offer an option to have footage from your wedding edited on the
spot and shown during your reception. This can be a fun surprise for guests on
the day-of!
Full-length documentary (30-90
min) – If you are interested in reliving the majority of your day, this option
is for you! Your videographer can create a longer film that includes entire
sections of your wedding, like your ceremony. Due to the length, this option is
the most like a true movie of your wedding.
Most videographers offer additional options
to receive additional footage from your day. A few popular add-ons include:
dancing, full edit of ceremony/reception, father/daughter dance etc.
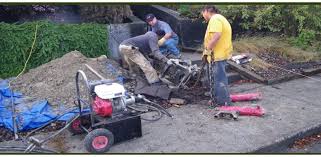
Trenchless Pipe Replacement – Advantages to No Dig Repairs
Trenchless Sewer Repair
Periodically,
those underground plumbing lines can become damaged and need to be repaired or
replaced. If you notice a sewage smell in your yard or are seeing wet spots on
the lawn, you could have a problem with the underground sewer line leading out
of your home. Traditionally, repairing one of these pipes would require digging
up your yard in order to replace the pipe. Now, fortunately, you have the
advantage of a trenchless sewer repair. A certified plumber will be able to
assess your concerns and offer viable solutions if any repair is needed.
THE PROS AND CONS OF NO DIG TRENCHLESS SEWER REPAIR TECHNOLOGY
A new
no-dig solution has arrived! For the past 15 years, the emergence of the
trenchless sewer repair technology has dramatically changed how people
perceived pipe repairs and replacements. From new drain installations to
clearing clogs to repairing and replacing sewer lines, trenchless services
provide the ultimate solution. Sewer line repairs made this way have more advantages
to offer!
Pros
Trenchless
sewer repair has many benefits over traditional methods:
Higher quality
State-of-the-art
equipment and superior materials are used by expert plumbers to repair broken
sewer pipes. In turn, you end up with an extremely durable pipe system that
will not corrode, rust, crack, nor fall apart due to tree root invasions.
Greater Time-Efficiency
Expert
plumbers can carry out the trenchless sewer pipe lining method in as little as
a few hours towards bring your pipes to a new-like condition. You get to save
time and spend it on what matters most.
Cheaper
Lining
sewer pipes save residential and commercial properties up to 75% in costs as
compared to replacing the old pipe with a new one. The cost of labor goes down
as less hours are needed to complete the trenchless operation. It’s simply the
best value out of all the repair methods just about anywhere else.
Versatile
You won’t
have to worry about your old sewer system being made of traditional materials
such as concrete, cast iron, orangeburg or clay. Trenchless CIPP technology
works for all kinds of pipes, and presents two repair and replacement options
of pipe lining or pipe bursting.
Eco-Friendly
You are
bound to enjoy big savings in the long run, apart from helping save the planet,
by simply opting for an environment-friendly sewer line repair process.
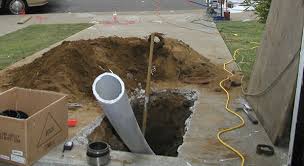
No-Dig Technology
The
process of trenchless pipe rehabilitation is a no dig solution that makes use
of the existing pipe structure, so extensive excavation is no longer needed.
Trenchless technology is called as such, simply because creating a trench or a
hole in the ground to reach the problem pipe is totally unnecessary.
Durable
Pipes
lined with epoxy resin can last up to 50 years. It is the most efficient and
non-invasive method of repairing your sewer pipes, and arguably the wisest
investment that returns numerous benefits.
Con
On the
downside, there are rare occasions when it might be already too late to
rehabilitate a pipe system using the trenchless method. The sewer line could be
irreversibly damaged and corroded to a great extent, leaving even the most
knowledgeable and experienced plumbers no choice but to manually dig up
trenches to replace the pipes.
BENEFITS OF TRENCHLESS “No Dig” PIPE REPAIR
You Save Money Three Ways – It doesn’t take a full crew of
technicians to handle trenchless repairs, so you save on labor
costs. You also save the time of master plumbers on the clock because
the process is efficient and finishes up much more quickly than traditional
techniques. Your new water or sewer line will last for years, and that
saves the expense of future repairs.
Downtime Is Significantly
Downsized – The time it takes to dig trenches, pull up damaged pipes,
lay in replacements and finish the job averages two weeks. All the while,
you have to make different living arrangements, and the process can shut
down business operations. Trenchless “No Dig” pipe repair only
takes one or two days from start to finish, so you return to the house and
the office in far less time.
The Landscape Doesn’t Change– Digging up pipe in the yard or
around your commercial building means tearing up lawns and uprooting
shrubs. It’s a messy job that can ruin grass because sewer line
replacements can contaminate surrounding soil and cause long-term turf
problems. Trenchless “No Dig” technology spares your landscape’s
natural good looks and helps preserve its health. Having to deal
with commercial plumbing repair can provide a lot of
discomfort for many businesses who rely on getting sales on a daily
basis.
Infrastructure Stays Safe and
Sound–
Excavating pipe under parking lots doesn’t attract customers, and
pulverizing the patio doesn’t improve relaxing in the backyard.
Traditional replacement techniques pose structural hazards to home and
building foundations, but trenchless pipe repairs spare
expensive infrastructure like sidewalks, loading docks and commercial
driveways.
Trenchless Repairs Rehabilitate
Pipes–
The trenchless “No Dig” process restores damaged water
and sewer lines with special epoxy-treated material that bonds
with existing pipe. This proven process creates a barrier that resists
cracking and root invasion for years longer than traditional
materials. The lining never rusts or accumulates hard water buildup, and
it actually improves flow capacity.
Which method of trenchless technology is right for me?
While this
question is best answered after your trenchless contractor inspects your drain
system, we will provide you with what we see most sensible.
If you have a home built on a slab:
If your
sewer is located under a concrete slab, we find cured in place pipe lining is
most cost effective. Because pipe lining requires only one access point, it is
less disruptive than pipe bursting. If you have connections in the drain line,
a pipe liner can be installed right over the connections. After curing the
liner, reinstatement cutting tools cut out pinpointed sections of the liner to
restore flow to the connecting drains.
If you need a sectional drain repair:
Pipe coating
is most cost effective. With the ability to navigate bends and provide
pinpointed repairs, pipe coating can be quick and inexpensive.
If you are replacing your underground sewer
located outside your property:
Pipe
bursting is the preferred choice and typically the most cost effective. With
the ability to increase your pipe size and only requiring two access points
(provided your drain pipe not have connections in between) pipe bursting can
save your property from the irreversible scar excavation may leave behind.
How Trenchless Technology Works
Trenchless pipe repair options are available from our team at Hawaii Drain Pros. Whether you need pipe lining or trenchless pipe bursting, we can be of assistance to you. One option is to install a liner inside the damaged pipe through a single access hole that we will create during the sewer camera inspection that we will conduct in the beginning of our appointment. Once we have inserted the pipe liner, we will pull it and inflate it within the damaged pipe. Once the liner has cured in place, you will have a new pipe within the old damaged pipe. This non-invasive technique is efficient and cost-effective. On the other hand, our pipe bursting method will require two access holes on either side of the sewer line. We will pull a new sewer pipe through the current, albeit damaged one. We will have the old pipe burst outward.
You should never start any home maintenance or repair work
without proper preparation and safety tools. When working with electrical
items, make sure to unplug the unit or turn off the power to the specific
circuit. Don’t forget that water and electricity don’t get along, so make sure
to unplug anything electric before cleaning. Never use a metal ladder when
performing electrical tasks.
Use electronics accordingly
It’s important to be smart about how you’re using
electronics. Avoid plugging in too many things into one circuit, which can
overload it and cause a power outage. Be mindful of where you place small
appliances and electronics, such as toaster ovens and hair dryers. Make sure
they’re not under any vents that could potentially drip on them or are too
close to a source of water, such as sinks and showers. Further, the
Occupational Safety and Health Administration recommends installing
ground-fault circuit interrupters for all of the outlets in wet locations, such
as kitchens, bathrooms and laundry rooms. They’re designed to turn off electric
power immediately in the event of an incident, which can be a potentially
life-saving feature.
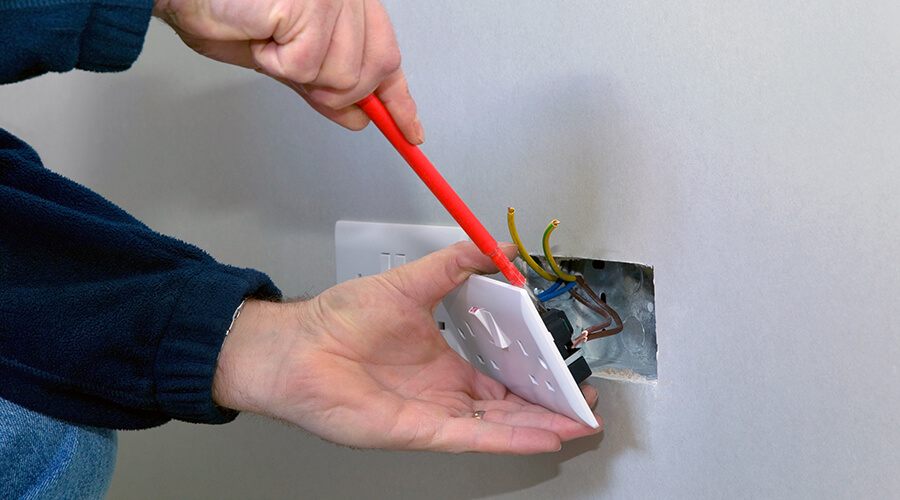
Be mindful of plugs, outlets and wires
Treat your plugs kindly and don’t force them to fit into
outlets. Don’t try to bend and adjust the prongs, as this could cause an
electric shock. Alternatively, if it’s loose inside the outlet, it may be time
to replace the cord for a fresh plug. Replace old outlets with new electric
sockets with advanced safety features, such as built-in surge protectors.
Unplug extension cords when you’re not using them to avoid an electric and fire
hazard. When you’re outside, only use cords and electrical items that are
specifically for the outdoors.
Schedule routine professional check ups
Electricity can be dangerous, so never hesitate to call a
licensed electrician for help. In fact, one of the most important steps in good
electrical maintenance is having a professional inspect your system at least
once a year. An electrician can check your electric panel, replace damaged
wires and test circuit breakers.
Electrical Safety & Maintenance Tips
Consistently tripped breakers (or blown fuses)
are an indication of electrical system problems.
Flickering or dimming lights are warning signs
of an overloaded circuit.
A burning odor or a mild shock coming from an
outlet are also signs of an overloaded circuit.
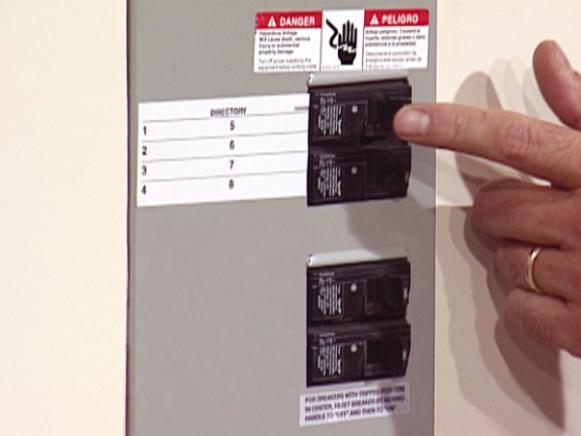
Make sure that all the breakers or fuses in your
breaker box are clearly labeled.
Never plug two or more extension cords together.
Always check an extension cord for damage before
plugging it into an outlet.
Only plug one major appliance (refrigerators,
washing machines, dishwashers) into a receptacle outlet at a time.
All major appliances should be plugged directly
into a receptacle outlet.
An overreliance of extension cords indicates
that there are not enough outlets in your home.
Never use a three prong plug in an outlet with only
two slots.
Never attempt to use an extension cord as
permanent wiring.
Never use an electrical cord outside that isn’t
specifically designated for outdoor use. Indoor cords are not designed to
withstand the elements.
Extension cords should never be placed
underneath rugs or in the path of a heavily trafficked area.
If you have toddlers or young children, make
sure that you replace all your easily accessed outlets with tamper resistant
receptacles.
Only use the appropriate wattage bulb for a
lighting fixture. An incorrect wattage might start a fire.
Ground Fault Circuit Interrupters (GFCIs) are
required by the National Electrical Code in every room/area where there is a
water fixture. Homes built before 1970 might not have GFCIs installed in
outlets.
Check your home’s outlets for GFCI protection.
If the outlets do not contain a red rest button, they have not been replaced
with GFCIs.
Arc-Fault Interrupters (AFIs) protect against
dangerous arc-faults. AFCI Breakers should be installed in your home to combat
arc-faults caused by damaged, overheated or stressed wiring.
AFCIs should only be installed by licensed
electricians.
If your home is over 40 years old or has
recently had a major addition, renovation or large appliance added it should be
inspected by a licensed electrician.
Tips To Maintain Your Electrical Wiring
The presence of live current in switch boards
and sockets, however mild they might be, can be a sign that your wiring has
been exposed to water or is not getting earthed right. If a switch in the
washroom or kitchen gives you even a tiny shock when you turn it on and off,
chances are that there is an issue.
Notice frequent dips in voltage, flickering
lights once in awhile or bulbs fusing more often than they should? Definitely a
sign of internal electrical wiring damage.
Appliances can get damaged by short-circuiting,
but there are times when the only sign of the fluctuation or short circuit is
through the appliance malfunctioning itself. If your plug sparks when it is in
the socket or an adapter heats up and doesn’t work even though the voltage is
appropriate, then there could be a problem with the electrical outlet.
Each circuit board has a specific limit to the
load it can take, but within that limit, the appliances connected to it should
function perfectly. If the turning on of the dishwasher or air conditioner
causes lights to dip, the circuit may be damaged and unable to take the load.
Besides visible signs, make sure that you keep
an eye out for open wiring being chewed by rats or raccoons in the attic, or
rainwater accumulating around the circuits in the basement. Even though the
impact may not be immediate, any noticeable damage to the wires can lead to
serious internal havoc.
The far-reaching effects of faulty wiring bring to mind the
much used saying ‘better safe than sorry’. A small investment in a
professional, DIY check-up of your electrical wiring or getting the home
warranty for your home can be imperative to keeping you and your loved ones
safe. Repairs are costly and maintenance is no doubt an easier way to prevent
future problems, so we bring to you seven simple tips to keep track off and
maintain your entire electrical wiring system.
Routine Testing
Mark your calendars and keep a monthly check on your
electrical outlets, you can do this by yourself and won’t need any assistance.
The testers are inexpensive – you can find them at any home hardware store. A
three-prong plug, the tester will have indicator lights on each prong. As you
plug the tester into each outlet, the lights indicate any problems with the
individual outlet. The earlier you know the problem the easier it is to get it
solved and the risk of fire or a greater electrical malfunction is avoided.
Electrical Safety Checklist for Your Home
If you have breakers tripping and fuses blowing
on a regular basis,it’s time to bring in a professional to inspect your home.
Be sure all your circuits are properly grounded.
A circuit consists of wires transporting electrical current to your lights and
appliances, so properly grounded wiring is connected to a ground wire in your
home.
All outlets near wet locations such as kitchens,
bathrooms, or laundry rooms should be Ground-Fault Circuit Interrupters (GFCI).
Water and electricity don’t mix, so unplug any
appliance before you wash or wipe it down.
If you have children or grandchildren, put
protectors in all your outlets or replace them with tamper-resistant outlets,
as these outlets are now required by code in all new homes.
Replace any frayed wires in your house, as they
can potentially cause shocks or fires.
Replace all plugs that wobble or fit loosely in
the socket.
Never force a plug into a socket, and never
attempt to adjust a plugs metal prongs to make it fit. Both actions are
dangerous!
Make sure all plugs and cords are kept a safe
distance from heat sources such as radiators or space heaters. Don’t place
furniture on top of cords, and don’t run cords under rugs or blankets.
Any indication of dimming lights, flickering
lights, a sizzling sound, or a burning odor mandate a prompt professional
investigation.
Never plug a generator directly into your home’s
electrical system, as this can unintentionally damage appliances or even put
you at risk. Hire an electrician to get it done safety.
When outside, only use cords (and items) labeled
for outdoor use.
Extension cords are a temporary solution. They
shouldn’t be used to power home appliances on a permanent basis. Most extension
cords aren’t built to handle high-powered items such as air conditioners,
refrigerators, or space heaters.
Don’t leave extension cords plugged in if
they’re not in use, as they can create an electrical or fire hazard.
Why Have Electrical Wiring Maintenance?
Keep Your Home In Good Condition
So to keep your home in the best condition possible, follow
these top tips. Not only will you keep your home in better condition for
longer, but you can save yourself a few extra pounds on your energy bills. We
hope that this article was helpful if it was then why not share on social
media?
Replace Don’t Repair
If you find out that you have a problem with your home’s
electrics and you’re given the option to replace or repair, we always recommend
repairs. Simply because with repairs you can’t always foresee how long the
repair is going to last before it becomes faulty again. With a replacement, you
are guaranteed a brand new working part that you know is reliable. Sometimes
things can be repaired but only for a short amount of time, which is why we
always recommend replacing over the repair. Even if it does cost slightly more
than a repair, you will save money in the long run on frequent maintenance and
repairs, as well as saving on your energy bills.
Have Your Appliances PAT Tested
PAT testing is a legal requirement for all commercial
properties, landlords and business owners, each must ensure that all kitchen
appliances and other electrical appliances have gone through PAT testing Milton
Keynes before they can be used. In the case of a faulty appliance in the
workplace that causes injury to yourself or others both the landlord and
business owner are liable for not creating a safe environment. Read more about
safety at work here.
Don’t Overload Your Electrics
Overloading your electrics is easier than you would think.
The worst culprit of this is extensions leads. Extension leads are extremely
popular in homes and allow you to give a wire extra length to sit further away
or in a different place. Extension leads are commonly plugged into each other
while also having other appliances plugged into them.
Never Attempt DIY Electrical Work
Electricity is extremely dangerous and can cause severe
injuries if it’s tampered with by someone inexperienced. Always rely on an
electrician to carry out any electrical work within your property or commercial
building. Qualified electricians are always the safest option, and by tampering
with your own electrical wiring, you have the possibility of causing more
damage which will end up costing more than an electrician would.
When you open an outlet, it can be useful to figure out the
position of the outlet or switch in the circuit, as well as the function of
each wire. This knowledge can help you pinpoint problems and connect wires to
the correct terminals when making repairs.
If you can’t find the source of a problem with an outlet,
work from that point back to the service panel, troubleshooting each load on
the circuit and its connections until you locate the fault.
End-of-Run Outlet
When there’s only one cable entering an outlet box, it means
the outlet is the last fixture on the circuit. Power comes from the service
panel along the black (hot) wire through other outlets, switches, and light
fixtures on the circuit and begins its return to the source through the white
(neutral) wire attached to this outlet. The black wire attaches to a brass
terminal; the white wire, to a silver terminal.
Middle-of-Run Outlet
Two cables entering an outlet box indicate that the outlet
is not the last fixture on a circuit. One of the black wires receives power
from the service panel; the other sends it on to other loads on the circuit.
The white wires allow current passing through the outlet and the other loads on
the circuit to return to the panel.
Electrical Wires
The black wire is the “hot” wire, which carries
the electricity from the breaker panel into the switch or light source.
The white wire is the “neutral” wire, which takes
any unused electricity and current and sends them back to the breaker panel.
The plain (or it can sometimes be green) wire is the
“ground” wire, which will take electricity back to the breaker panel,
then outside to a rod that’s buried in the ground. This is to prevent the
electricity from running through you!
How to Trace Electrical Wiring in a Wall
If you need to find the wires inside your walls, you’ll
probably want a non-invasive way to look for them. After all, without a method
to your madness, you’d just be hammering unsightly holes through your drywall
in a vain attempt to cross paths with your wires. Instead, there’s a better
way: With the right tools and techniques, you can locate, or trace, your wiring
without damaging your walls.
Tracing electrical wiring in walls can be tricky, and it
involves more than just looking for the wires themselves. To figure out exactly
where the wires are, you’ll look for the outlets and appliances that each wire
connects to. You’ll also figure out which circuit breaker applies to which
section of your home’s wiring.
You may be wondering why someone would go through all that
trouble just to figure out the locations of wires. Knowing where your wires are
can help you make repairs, plan for home improvement projects and even make
your home safer. By knowing which outlets are on which circuits, you can decide
where to plug in power-hungry appliances without overloading your electrical
system. If one of your outlets is on the fritz and you don’t have an electrical
blueprint of your home to use as a reference, tracing the wiring can help you
figure out exactly where the problem is. If you want to run new wires to a home
theater system or other electronics, knowing your current wires’ locations can
help cut down on electrical interference, which can lower the quality of your picture
and sound. And you’ll definitely need to know where the wires are if you plan
to do any renovation or demolition projects to your inside walls. Breaking into
a live wire could damage your home and cause serious injury.
Tips for Easier Home Electrical Wiring
Uncoil Cable Without Kinks
Pulling plastic-sheathed cable through holes in the framing
is a lot easier if you straighten the cable out first. If you simply pull the
cable from the center of the coil, it’ll kink as you pull it through the studs.
The trick is to lift a handful of coils (four loops will reach about 12 ft.)
from the center of the roll (left) and toss them across the floor as if you’re
throwing a coiled rope. Next, walk along the length of cable, straightening it
as you go (right). The electricians we talked to prefer this method because
they can keep the cable contained in the plastic wrapper for easier handling
and neater storage.
Pack Electrical Boxes Neatly
If you’ve done much wiring, we’re sure you’ve had times when
you could barely push the switch or outlet into the box because there were so
many wires. The solution is to arrange the wires neatly and then fold them
carefully into the box. Here’s how to keep wires neat and compact: First,
gather all the bare ground wires along with a long pigtail and connect them.
Fold them into the back of the box, leaving the pigtail extended. Next, do the
same for the neutral wires. If you’re connecting switches as shown here, you
don’t need a neutral pigtail. Leave the hot wire extra long and fold it back
and forth across the bottom of the electrical wire box. Put a wire connector
cap on the hot wire to identify it. The neatly packed box makes it easy to
identify the wires and leaves you plenty of room for the switches.
Remove Sheathing from Underground Feeder (UF) Cable
Underground feeder (UF) cable has a tough plastic sheathing
that allows you to bury it directly in the ground without running it through a
conduit (of course, it has to be buried deep enough to satisfy the electrical
code). But that tough sheathing is also difficult to remove—unless you know
this trick. Start by separating the black and white wires from the bare copper
by grabbing each with pliers and twisting (top). They’re easy to tear apart
once you get them started. Pull them apart until you have about a foot of
separated wires. Next, remove the sheathing from the insulated wires by
grabbing the end of the wire with one pliers and the sheathing with another
pliers and working them apart. After you get the sheathing separated from the
insulated wire at the top, just peel it off (bottom). Repeat the process to
remove the sheathing from the black wire. Finally, cut off the loose sheathing
with scissors or a knife.
No-Snag Fish Tape Connections
After going to all the trouble of working your fish tape to
its destination, the last thing you want is to lose the cable or get your tape
stuck on something inside the wall as you pull it back. Here’s how to avoid
both problems. Start by stripping an 8-in. length of cable. Using a side
cutters, cut off all but one wire. Cut at a steep angle to avoid a “shoulder”
that could catch on something. Then bend the single wire around the loop on the
end of the fish tape and wrap the whole works with electrical tape to form a
smooth bundle. Now you can pull the wire without worrying that it might fall
off, and the smooth lump won’t get snagged by or stuck on obstructions.
Check the Whole Wall Cavity With a Stud Finder
A decent stud finder is a must-have for every wire-fishing
job, but don’t throw it back in your pouch after you’ve located the studs. Use
your stud finder to check the whole wall cavity for obstacles like blocking and
abandoned headers. You don’t want to find out the hard way that you should have
fished your wire one stud cavity to the left or right.
All About Electrical Wiring Types, Sizes, and Installation
Electrical Disconnect Switches
An electrical disconnect switch provides a means to shut off
the power to a home’s electrical system from an outdoor location. It is
typically mounted below the electric meter, either on the side of a home or on
the utility company’s power pole. Not all homes have a dedicated disconnect.
They are commonly used when the service panel (which also serves as the main
disconnect) is located indoors and therefore is not accessible to emergency
responders or utility workers. Like electrical service panels, a disconnect
must be installed by a licensed electrician.
Wiring an Electrical Circuit Breaker Panel
The electrical panel, or service panel, is the power
distribution point of a home electrical system. This is where all of the
individual circuits of the house get their power and where they are protected
by breakers or fuses. Wiring an electrical panel is a job for a licensed
electrician, but DIYers should have a basic understanding of how a panel works
and the critical role that breakers play in any system.
Maximum Number of Wires Allowed in Conduit
When running individual electrical wires inside conduit,
there is a limit to how many wires are allowed. The maximum allowable number is
known as the “fill capacity,” and this depends on several factors,
including the size of the conduit, the gauge of the wires, and the conduit
material. Metal (EMT), plastic (PVC), and flexible conduit all have different
fill capacities, even when they’re nominally the same size.
How to Strip Electrical Wire
Stripping electrical wire involves removing the plastic
insulation surrounding the wire’s metal core. It’s important to do this
carefully so there is no damage to the metal. The procedure is simple but
requires a special wire stripping tool and an understanding of how to use it. This
is a critical skill—and tool—for DIYers to have for any wiring project.
Direct Burial Cable
Standard electrical cable is designed to be run indoors,
where it stays dry and is protected by wall, ceiling, or floor structures. For
outdoor projects or when running wiring underground, you must use direct burial
cable, which can be installed underground with or without conduit (depending on
local building code rules). With direct burial cable, the individual conducting
wires are embedded in solid vinyl to fully protect them from moisture.
Essential Tips for Safe Electrical Repairs
Box and Clamp It
The National Electrical Code (NEC) requires that all wiring
connections be made in an appropriate enclosure. In most cases, this means an
electrical box. Enclosures not only protect the connections—and protect people
from accidental contact with those connections—they also provide means for
securing conductors (like electrical cables) and devices.
Respect Grounding and Polarization
Grounding and polarization are essential for the safety of
modern electrical systems. Grounding provides a safe path for stray electrical
current caused by a fault or other problem in a circuit. Polarization ensures
that electrical current travels from the source along “hot” wires and
returns to the source along neutral wires.
Make Tight Wiring Connections
Electricity travels along conductors, such as wires and the
metal contacts of outlets and sockets. Tight connections between conductors
create smooth transitions from one conductor to another. But loose connections
act like speed bumps, restricting the flow and creating friction and heat. Very
loose connections can lead to arcing, in which electricity jumps through the
air from one conductor to another, creating tremendous heat.
Check Amperage Ratings
All electrical wiring and devices have an amperage, or amp,
rating. This is the maximum amount of electrical current they can safely carry.
Most standard household circuits are rated for 15 amps or 20 amps, while
large-appliance circuits (such as for electric dryers and ranges) may be rated
for 30, 40, 50 amps, or even more.
Test for Power
The best way to prevent electrical shock is to ALWAYS test
wires and devices for power before working on them or near them. Simply
shutting off the power isn’t good enough.
A 2013 study showed that peppermint essential oil had a
repellent effect against yellow jackets and paper wasps.
You can take advantage of this effect by putting a few drops
of peppermint oil on several cotton balls. Place the cotton balls around your
patio, outdoor furniture, or wherever you spend time outside to keep wasps,
hornets, and yellow jackets away.
Plant These Plants
There are certain plants that wasps don’t like to hang
around, so adding these plants to your yard can help keep wasps at bay.
Consider planting the following wasp-deterring plants around your yard.
Avoid Floral Scents
Avoid wearing bold floral scents when you’ll be spending
time outside. This could include perfumes, body sprays, lotions, and other
scented products. Floral scents can attract wasps, and no one wants to be a
walking wasp magnet!
Make A Decoy Nest
Wasps are very territorial, so if they see a nest near your
home, it may deter them from building a nest nearby. You can take advantage of
their territorial nature by making a simple decoy wasp nest!
Move Hummingbird Feeders
Hummingbirds love hummingbird feeders, but wasps do too! If
you have a hummingbird feeder in your backyard, you may want to move it to a
secluded area or bring it inside when you or your guests will be spending time
out there.
How to Find a Wasp’s Nest and What to Do Next
How do you know what kind of nest it is?
There are several features that will enable you to
differentiate between the nests of different wasp species:
-If the wasps appear to be coming from a hole in the ground,
on a building or in a tree, they are most likely yellow jackets. A single
yellow jacket nest can contain as many as two thousand insects.
The average hornet’s nest will be round with a slightly
pointed bottom, about the size of a football, and have fairly smooth “papery”
walls with a single large opening.
A paper wasp’s nest will have large, hexagonal open combs
and a “stalk” from which it hangs. Many have described the appearance of the
nest as an “umbrella” due to the distinctive shape. Paper wasps are sometimes
referred to as umbrella wasps because of this.
-If the nest you’re looking at is formed of yellow layers
with tight hexagonal combs, and appears to be made from a waxy substance,
you’re most likely looking at a honey bee hive. These are rarely aggressive and
are a protected species that is important for the environment.
How to Find Wasp Nests
How to Destroy the Wasp Nest
Destroy – To destroy the wasp nests apply NO Wasps Eliminator to the entrance, particularly where the wasps land to walk into the nest entrance. The wasp picks the powder up on their feet and carry it into the nest.
Stay Safe – Although powder insecticides help keep wasps calm, for safety apply the powder late in the day when activity is low or has stopped.
Tip for Nests in Eaves – The new NO Wasps Eliminator adheres better to surfaces. However, although it puffs upwards well, it can still be difficult to get the powder to the nest entrance. A temporary ad hoc solution is to use the dip tube from a trigger sprayer e.g. NO Bugs Super 1L RTU or other trigger bottle typically found under a kitchen sink. Clean and dry it, and it will fit neatly into the aperture of the NO Wasps Eliminator puff bottle. Push the dip tube down to the level of the powder. The puffer will now puff the powder upwards easily and the nozzle can easily be inserted into the small holes and gaps that usually constitute the entrance to the nest.
wasp hive
What’s the best way to get wasps to go away?
Wasps are attracted to white, bright blue and yellow, but
can’t see red, so plan your wardrobe accordingly.
Their vision is also optimised to look for the sudden, sharp
movements of insects, so wildly flailing as you try to swat a wasp will just
make it more determined.
Killing a wasp also releases pheromones that will attract
other wasps nearby. Instead, calmly trap the wasp under a glass, so it can’t
return to the nest and tell the others where to find your food.
A 2012 study tested the wasp-repelling properties of different
essential oils and found that a mix of clove, geranium and lemongrass oil was
the most effective, so try a dab behind each ear.
Getting Rid of Wasps and Hornets: 5 Crucial Facts You Should Know About Their Behavior and Life
Mind that the wasps can sting not only with the sting
itself. These guys are so insolent and evil that they also use their mandibles,
as well. They rip the victim’s skin as they would with teeth, and it hurts
very, very much.
Vivid, artificial, sweet smells and alcoholare to wasps like
a red rag is to a bull. They feel these odors miles away and are eager to taste
those who carry them. Fragrances and colognes especially excite the yellow
jackets. The worker waspsare also attracted by puddled water – get rid of
leakages in the backyard.
Wasps go nuts in summer. They reproduce actively and protect
their offspring. The hot weather impacts them greatly and these insects sting
anything that moves and – most
importantly – smells nice.
It’s best to fight the wasps and the hornets in spring or in
autumn. In autumn, yellow jackets lose their enthusiasm and aggression, become
drowsy, and slowly retire. It’s extremely easy to access and destroy the hive
at that time. By springtime, the queen will have spawned lots of defenders for herself
and will be too busy building a nest. You’ll suffer throughout the whole summer
if you don’t take your chance at that moment.
Most often the wasps settle in colonies. There could be
thousands of these insects in the same nest. They all are subordinate to the
queen, who is the head of the nest. The queen is the only member of the colony
that survives the winter – that is proven by many scientists including Jeff
Hahn, Laura Jesse and Patrick Liesch from the University of Minnesota. So
killing all the workers, but leaving the queen alive means working in vain.
Another disadvantage of such sociality is the ability of wasps and hornets to
attack as a team. The smell of their congeners’ venom excites them and makes
them join the attack on the victim.
Forty to fifty percent of all marriages in the United States
end in divorce. In 1969, California was the first state to legalize no-fault
divorce. In 2010, New York was the last of the fifty states to approve it.
No-fault divorce does not require any evidence of wrong-doing on the part
of either spouse. Although divorce is a difficult emotional decision, in terms of
the law, it can easily be granted under a no-fault divorce ruling.
Divorce in the United States is in accordance with state law
rather than governed extensively by federal regulations. A divorce lawyer
specializes in civil law. This field can be saturated with emotions and
life-changing decisions. Therefore, a divorce lawyer must delicately yet justly
handle a wide variety of family law issues from divorce, marriage annulment,
and legal separation to child custody, child support and visitation rights. They
are also called divorce attorneys or family practice lawyers.
A divorce can take three to twelve months to finalize.
However, it depends on how the divorce is filed. It may be a fault or no-fault
divorce, contested or uncontested divorce or simplified divorce. The many legal
issues to settle and the amount of conflict to mediate influence the time
frame.
Educational
Requirements
There are no specific educational requirements for a divorce
lawyer however, some courses are advised. Law school attendance and passing the
bar examination is compulsory. With an interest in divorce law, a law
student may select courses in family law to help him specialize in child
custody issues, family dysfunction and property rights. While pursuing a Juris
Doctorate (J.D.), a law student can receive a certification in family law. In
addition, certain law schools offer a Master of Law (LL.M) in Family Law which
would follow the acquisition of a J.D..
Job
Description & Skills Required
When terminating a marriage, many legal aspects must be
addressed. A divorce lawyer is responsible for the division of assets and debt
among spouses. If there are children involved, a divorce lawyer helps set the
terms for child custody and child support. Thorough research is required in
order to gather supporting evidence in each case. Detailed paperwork must be
compiled and then submitted to the court documenting the evidence. For
legal separations, a divorce lawyer carries out the separation through court
orders.
A divorce lawyer must excel in a few unique skills. They
have to be an attentive listener because the decisions made in or out of court
will greatly affect their client’s lives. Although it may be difficult,
it is vital a divorce lawyer remains non-judgmental to assist them in promoting
their own client’s best interests. Their interpersonal skills must be strong
because they are dealing with a variety of relationships in their profession.
Advocacy, mediation and alternative dispute resolution skills should be
acquired and mastered in law school as well as through continual work
experience in the field.
The cheapest way to get a divorce with a child
The cheapest way to get a divorce with a child involves both
you and your spouse to remain cordial, and be ready to compromise on several issues.
Property division and child custody, which are the main battle fronts in most
divorce proceedings.
To get a cheap divorce, you can start the process online and
minimize the number of professional services you contract. In order to get the
cheapest divorce possible, you must make sure that both you and your spouse are
willing to work together and your divorce is uncontested.
Even if you plan on representing yourself, divorce can be
expensive. However, there are ways to make it cheaper or even divorce with no
money.
Here are some tips to
go about it:
Divorce fee waiver
Each state has an indigent fee
waiver that allows you to file for your divorce without paying the filing
costs. When you go into your local court, ask the court’s clerk what forms you need
inorder to waive the fees. This option is only available and designed for those
with limited finances while filing for divorce.
Getting divorce forms
You can get the divorce forms online from the local divorce
court site or use a service like mydivorcepapers.com we highly recommend. You
can also download the form for asking for a fee waiver. Some sites have
instruction booklets that help users in filling the forms. If you can easily
access the courthouse, then the clerk can help you with the forms and instructions
for filling them.
Provide financial proof of indigence
Include proof of your income, debts, and tax returns to
prove to the court that you cannot afford the court fees. You will then get the
forms notarized by your bank or the court clerk.
Once the is done, the court will review your applications
and once the fee waiver is approved or deferred, you can move forward with the
case. You can simply file a settlement or make a court appearance together and
tell the judge what you have agreed on. If the divorce is uncontested, then
your ex-partner does not need to appear in court, this will be a quick process
and much cheaper on both of you.
Here is a list of the 9 things you should never do during a divorce:
1. Don’t forget to consult an attorney.
A lawyer can make sure that you both review and understand
anything before you sign or agree. An experienced family law attorney is often
a good idea for situations where the divorcing couple has a large amount of
assets, property or other complicated financial matters. In more contentious
divorces, an attorney can make sure that your interests are represented in
court. Even in a “friendly” divorce you are often better off hiring a lawyer to
help file paperwork and guide you through the court system.
2. Don’t neglect your finances.
If you’re thinking about divorce, you need to immediately
begin to set aside money for the all the expenses involved. Make copies of all
your financial documents and legal records before your divorce proceedings
begin. These documents should include bank and investment statements, wills,
trusts, tax returns, property deeds, insurance policies and vehicle titles to
name a few. Keep these copies in a secure location not accessible by your ex.
3. Don’t immediately tell everyone you are getting a
divorce.
Emotions are running high, it’s perfectly normal to want to
let others know what’s going on in your life. You may desperately want support,
you may not want to suffer in silence, or you may just want to punish your
partner and embarrass them. This doesn’t mean that you have to keep your a
divorce secret from everyone, you just need to decide who you tell and why.4.
Don’t use your children as pawns.
This should go without saying, but unfortunately, it still
happens, even unintentionally. Check your own behavior and don’t use your kids
to punish or manipulate your spouse. In the end, this will cause resentment and
have a negative impact on the relationship you have with your children.
5. Don’t take divorce advice from family and friends.
It’s only natural that those close to you want to provide
support during this time. Everyone wants to share their experiences, offer
opinions and give advice. Your family and friends may have good intentions, but
their divorce experience is based on the facts and circumstances that are
unique to them and may not apply in your situation. Let these friends and
relatives be there for you emotionally, but if they offer financial or legal
advice about your divorce, politely say “No thank you.” Your future is too
important.
6. Don’t do anything you’ll regret later.
While it is normal for you to feel conflicting emotions
making the end of your relationship into a bad reality show is never a good
idea. Act like everything you say, do, post, tweet, text or snap will
immediately be posted on YouTube. Don’t take your negative emotions feelings
out on your children, pets, or personal property. Don’t self-medicate with
drugs and alcohol. Don’t rant or fight with your ex on social media. At
best, these things could be used against you during the divorce proceedings, at
worst you could land on the wrong side of the law or lose visitation rights.
7. Don’t jump into another relationship.
This is not the time to start a new romantic relationship.
If you already have, consider putting it on hold. Even if you and your spouse
no longer live together, in some states a relationship outside of marriage can
become an issue during the divorce process. With all of the changes going on in
your life, avoiding any type of romantic relationship is often the best thing
to do for your emotionally.
8. Don’t focus so much on the little things that you
forget what’s important.
In a contested divorce, you are likely to accumulate
thousands of dollars in attorney’s fees because your lawyer must spend an
enormous amount of time preparing the case and filing paperwork. You may be
angry but remember the more you and your spouse argue over issues or
items, the more you pay in attorney’s fees. Concentrate on what really matters,
and focus on that. Leaving a decision up to a third party often means you end
up not getting what you really want, and with a gigantic legal bill to boot.
9. Don’t put your friends in the middle.
Having a couple close to them end their marriage can bring
up mixed emotions in your friends as well. They will often feel awkward and
uncomfortable around you or your ex. Let them know that this is okay, and that
you understand. It’s not fair to demand that your friends take sides. It’s up
to your friends–not you–whether or not they will continue to stay friendly with
your ex. Respect the choices that they make, even if you don’t agree with them.
Ten Things You MUST Do Before You File for Divorce
Be Certain You Want to Get Divorced
While this may seem obvious, the decision to get divorced is
an emotional one, and shouldn’t be made when you’re feeling overly emotional.
Make sure you’ve exhausted all hope of reconciliation before you file for
divorce. Once you’ve served your spouse with divorce papers, it can be
difficult to go back on that decision, even if you’ve changed your mind. The
court can grant a divorce even if only one spouse wants to end the marriage. If
you’d still like to give marital counseling a try, do so before you file for
divorce.
Interview Attorneys
It’s a good idea to interview more than one attorney before
you decide to file for divorce. You’ll want to work with an attorney that fits
your style, and understands your goals for litigation. Avoid lawyers who offer
you solutions before listening to the particular facts of your case. Attorneys
come at different price points and experience levels. If your divorce is likely
to be messy or deals with specific types of assets, be sure your attorney is
qualified to handle your particular case. For more information, see What to
Look for in a Divorce Lawyer.
Gather Financial Documents
Divorce cases depend heavily on documentation. Your
financial account records, phone records, mortgages, and car notes are all
likely relevant to the divorce. To the extent possible, gather all the
documents you’ll need for your case before filing for divorce.
If you and your spouse have a shared file of paper records in your home, make
copies of everything before meeting with your attorney. It’s also smart to
obtain records of your shared online accounts. Not all spouses react well to
being served with divorce papers, and some will make it difficult to access
documents after you’ve filed. Save yourself potential future headaches by
getting your hands on the documents ahead of time.
Determine Your Goals for Custody
If you have children, their custody situation is probably at
the forefront of your mind when getting a divorce. You should know that, absent
extreme circumstances, you and your spouse will end up sharing custody of the
children. It’s a good idea to sit down and carefully review your work schedule,
your children’s schedule, and your other obligations and come up with your
desired schedule for custody. If you can come up with a arrangement that gives
both you and your spouse time with the children, you’ll be leaps and bounds
ahead of most people who file for divorce.
Make Necessary Purchases or Sales
In most jurisdictions, the judge automatically issues an
order at the beginning of your divorce case that prohibits you or your spouse
from selling, buying, or otherwise encumbering or disposing of any marital
property. Courts do this to prevent either spouse from draining the bank
accounts, or dissipating the marital estate out of spite.
If you’ve long been meaning to upgrade your car, or sell a
rental property, you’ll be prevented from doing so if you file for divorce
first. While it’s not appropriate to drain the bank accounts before filing for
divorce (as that can come back to bite you), if you have a legitimate sale or
purchase that’s been in the works, it’s best to complete it before filing for
divorce.
Figure Out Your Living Situation
Do you want to stay in the same house with your spouse
during the divorce? Do you plan to move elsewhere? Do you want your spouse to
move out? Decide what your goals are for your living situation, both during and
after the divorce. How you behave in the weeks and months leading up to your
divorce can affect your chances of winning use of the marital residence during
the divorce. For example, moving in with a relative or friend in the weeks
leading up to your divorce won’t help your chances of staying in the residence
during the divorce. Speak with your attorney about how to best position
yourself for the living situation you desire. Click here to find out more
about housing issues during divorce.
Talk to an Attorney About Joint Bank
Accounts and Credit Cards
Depending on how you and your spouse handle your joint
financial accounts and credit cards, your attorney may advise you to close the
accounts or leave them the same. You don’t want to be in a situation where your
spouse has the ability to run up bills in your name or drain the bank accounts
– both circumstances may take the entire divorce to sort out. Your attorney can
best advise you about whether you should divide the accounts in half, close
them, or leave them the same before filing for divorce.
Don’t Live Like You’re Single
Even if your marriage is for all intents and purposes over,
refrain from living the single life prior to filing for divorce. In most
jurisdictions, even if you and your spouse are living separately, having a
romantic relationship with another person is still considered adultery.
Additionally, a judge may consider money you spend on a paramour dissipation of
the marital estate, and could require you to reimburse your spouse for those
expenditures. In any case, it typically doesn’t help your case to have started
another relationship before your divorce has been filed. In some states you can
begin a relationship after filing for divorce; speak with your attorney about
how the court will view dating before your divorce is complete.
See Divorce and Dating for more information.
Prepare a Marital Balance Sheet
You can’t decide your financial goals for your divorce
without having an accurate picture of your assets and debts. While it’s not
usually necessary to hire an accountant prior to filing for divorce, it’s a
good idea to put together a simple balance sheet showing all of your assets and
debts. Include real property, cars, retirement accounts, bank accounts and
other assets, as well as any mortgages, notes, credit cards, and other debts.
This can give you an idea of what you and your spouse will split, and you can
start working on your desired division of the marital estate. Determining your
total assets can also help you set a budget for how much to spend on your
attorney and the divorce litigation.
One often overlooked aspect of divorce is the emotional toll
it may take on you and your family. Just as important as hiring an attorney and
obtaining relevant documents is surrounding yourself with people who can help
you through this difficult time.
Develop a Support Network
One often overlooked aspect of divorce is the emotional toll
it may take on you and your family. Just as important as hiring an attorney and
obtaining relevant documents is surrounding yourself with people who
can help you through this difficult time. If you have the financial means,
it can help to speak with a therapist or other mental health professional. At
the very least, speak with friends who have been through divorce. Let your
family and friends know that you’ll be leaning on them for advice and moral
support. Being emotionally stable will better prepare you to make smart decisions
as your divorce progresses.
Do You Need a Lawyer to Get a Divorce?
When it comes to divorces, most people want to get through
them as quickly as possible. Since the majority of the states accept no fault
divorces, you can quickly and easily get through the entire divorce process
within a matter of hours or days, depending on your state’s requirements.
However, just because you can get through a divorce quickly and without hiring
a lawyer does not mean that you should. The answer to, “Do you need a
lawyer to get a divorce?” depends primarily on your situation when you
begin to seek the divorce.
Times When You May
Not Need a Lawyer
A lawyer isn’t necessary for a divorce when you have no
marital assets or children. Oftentimes, this comes up when you’re getting an
annulment or when you’ve been married for only a short time. The quickest
routes through divorce court involve relinquishing all of your rights for
equitable support, as well as spousal support. If you don’t want these things,
then you don’t need a lawyer. All you need are the forms, which you can
generally obtain from your local courthouse or clerk’s office.
Times When You Do
Need a Lawyer
Whenever children are involved, you will want to have a
lawyer assist you with the agreement. In some states, the court may even
provide legal assistance. All states have some variation on a “best
interests of the child standard,” meaning that the primary focus in the
divorce will be providing for the children. Your rights as a parent could be
severely restricted, or you may find yourself in a difficult position. Whenever
you have assets in the marriage to be divided or want spousal support, you will
also want a lawyer. You should also get a lawyer if your spouse decides that
she wants any of these things, since you could easily find yourself losing just
about everything.
We love the flexibility of a flat roof for certain design limitations,
but they have a bit of reputation for leaks and repairs.
Of course, flat roofs are not flat but have a very slight roof pitch of
between 1/4″ to 1/2″ per foot. Just enough slope to drain water but
also flat enough to be a problem if not constructed properly.
The good news is that there are material options for your flat roof
beyond traditional hot-mopped built-up roofing that will increase the
reliability of the flat roof.
Let’s review the most common categories of flat roof materials available
for your home:
Single-layer membrane roof
Modified bitumen roof
Built-up roof (BUR)
Single Layer Membrane Roof
The membrane roof is the latest roofing technology and is also the roof
of choice in commercial construction. Known technically as elastomeric or
plastomeric roof membrane (depending on the material), single-ply roofs come in
a few different varieties including:
Neoprene (polychloroprene)
EPDM (ethylene propylene diene monomer)
PVC (polyvinyl chloride)
Chlorinated polyethylene and chlorosulfonated
polyethylene sheets
Polymer-modified bitumens
Of all these membrane types EPDM, synthetic rubber is the most common
single-ply membrane roof material in both residential and commercial use. So
all you need to be able to say to your roof contractor is you want an EPDM
rubber roof.
These roofs are installed as thin sheet materials 0.030 (30 mils) to
0.060 inches (60 mils) thick and are applied to the roof in a single layer.
Being made of synthetic rubber or polymer, they are flexible and elastic and
can handle temperature changes and some impact types better than built-up
roofs.
Membrane roofs are attached in a variety of ways. They can be partially
loose laid and held down with river rock ballast (requires roof structure to
support the weight) or fully adhered to the roof deck. EPDM and Neoprene roof
seams are fastened by adhesive and PVC roof seams are heat or solvent welded.
02. Modified Bitumen Roofing
Modified bitumen cap sheet roofing was developed in the 1960s as a
replacement technology for BUR, or built-up roofing, by using the proven
technology of BUR but also adding polymer reinforced roof wear layers or cap
sheets.
These roofs can be installed using any number of techniques which are
determined by the project’s specific requirements and material specified. These
installation methods include:
Hot applied
Torch applied
Cold applied
Self-adhered
The polymer used in the cap sheet provides improved elasticity and
flexibility in lower temperatures. The most commonly used polymers are atactic
polypropylene (APP) and styrene butadiene styrene (SBS). SBS imparts a
rubber-like characteristic to the bitumen.
SBS cap sheets are usually installed using cold adhesives or hot
asphalt tar. Thermoplastic APP sheets, on the other hand, are installed using
the torch applied method.
03. Built Up Roofing
Going back about 120 years, the grandfather of flat roofs is the
built-up roof or BUR. Built-up roofs have solved the low pitch roof problem for
ages, a challenge that asphalt shingles could never handle.
Built-up roofs are installed using several layers of a special type of
roofing felt that has been asphalt impregnated and embedded in bitumen applied
with a hot mop.
The hot-applied asphalt or coal tar pitch blends with the bitumen
soaked roof felt and creates a monolithic roof membrane. The roof felt/asphalt
tar layering is repeated in overlapping layers until the assembly is two to
fours plies in thickness.
A wear surface of finely crushed stone granules is usually applied to
the top layer of hot tar to protect the built-up roof assembly from UV light
and weather.
Why Do Flat Roofs Exist?
Before we get into comparisons of different flat roofing materials,
it’s important to know why they exist in the first place since they’re
seemingly such a hassle and an almost-immanent leak threat.
There are two main reasons behind why a contractor would call for a
flat roof:
1 aesthetics
2
convenience.
For example, when you’re adding on to a home (building an addition)
with something like a three-seasons room, a flat roof simply looks nicer. Homes
with unblended roof pitches can be an awkward eyesore.
In commercial buildings, flat roofs, outright, offer a more convenient
place to install outdoor HVAC units rather than putting them in high-traffic
ground areas.
Of course, any roof’s main job is to create a barrier of protection
between the building below and the atmosphere above. Therein lies the conundrum
associated with flat roofing. For all the aesthetics and convenience, the
design doesn’t do a lot to avoid snow and water buildup.
To be fair, flat roofs aren’t completely ‘bubble-level’ flat. They work
in much the same way as a gutter system, angled slightly or pitched a couple of
degrees, so that water can flow into a downspout. Even so, flat roofing
materials need to be able to absorb the brunt of the weather and to withstand
ponding water or snow and ice until it melts.
4 Best Flat Roof Materials
PVC Roofing
For many projects, PVC roofing is our preferred choice as the best flat
roof material on the market. PVC roofing is somewhat more expensive than other
single-ply commercial roofing materials, however it offers a wide range of
benefits for the price. First, the reinforced membrane makes PVC roofs
resistant to impact damage and the cracking which normally shortens the
lifespan of single-ply roofs. PVC roofing is one of the best flat roof
materials because it is low maintenance with a long lifespan. At J. Smucker
Contracting, we offer a 20-year warranty on new PVC roofing we install. In
addition, just like TPO roofing, PVC is a reflective white color which is
useful as it dramatically lowers the business’s energy bills.
Metal Roofing
A commercial standing seam metal roof is the ideal choice for a
building with a roof slope greater than 2 inches. Metal is different from most
other commercial roofing material types for a few reasons. Due to the expert
installation process and the nature of the material, metal is the most
expensive roof type to have installed. However, metal roofing has the longest
lifespan, lasting between 20 and 30 years. Metal is an extremely durable
material and is immune to cracks that affect single-ply roofs. However, metal
roofs can be susceptible to leaks around the seams and roof edges.
TPO
This very popular roof type is also among the best flat roof materials
to install. Not only is a TPO roof an inexpensive option, it has a decent
lifespan between 10 and 20 years. In addition, these white-coat roofs have all
of the same energy saving properties as PVC roofs. Plus, they require less
maintenance than EPDM roofs, as the seams are heat welded to prevent leaks.
Modified Bitumen Roof
When compared to other commercial roofing materials, modified bitumen
stands out as the more-budget friendly option. Modified bitumen roofs use an
asphalt membrane as the base of the roof itself. This surface is susceptible to
cracking and blistering which reduces the typical lifespan to just 10 to 15
years. While the lifespan is less than the more advanced options, the price point
alone can make modified bitumen one of the best flat roof materials for some
businesses.
Why Are Flat Roofs Less Common For Houses?
Also known as low slope roofs, flat roofs are less common in North
American residential construction because the low slope of a flat roof has an
increased tendency to collect water rather than shed, like its more steeply
pitched alternative. This may make it less ideal for rainy or snowy climates.
Keep in mind, all flat roofs have a slope of between five and 15 degrees
to allow water to flow into drain systems (such as eaves, drainage holes or
outlets).
Flat Roof
Drain Types
So, even though flat roofs are ideal for drier landscapes, in climates
with heavy precipitation, a properly installed flat roof can be a fine choice
for a homeowner – especially thanks to ever-improving waterproof materials and
installation techniques.
It looks
good
Flat roofs are an attractive aesthetic choice that give homes a unique
form. If you love the landscape or cityscape around your home, a flat roof can
help complement that without obscuring the view.
Flat Roof
Space Is Usable Space
Unlike a steeply pitched roof, most of the square footage of a flat
roof is available for use. This offers the option to add a unique application such
as a rooftop patio, garden or green roof. Solar panels also are popular among
homeowners and are much easier to install – and hide from view – on a flat
roof.
Any of these applications will require certain design considerations
(such as adding guardrails and other safety protections and/or using more heavy
duty materials to handle roof traffic and weight). Special permits may be
required from the local building authority, but these efforts may result in an
entirely new feature to enjoy on your home.
It
Performs And Protects Well
Flat roofs are a cost-effective option for homes – thanks to
generations of use in commercial flat roof construction, modern materials and
application techniques – as viable, protective and long-lasting alternatives to
pitched roof counterparts.
By choosing the proper materials, hiring an experienced professional to
build and install the flat roof, and committing to regular inspection and
maintenance, homeowners may count on many years of reliable performance when
selecting a flat roof solution.
When are Flat Roofs Used?
Flat roofs are often used on structures that are not a standard part of
the living area. For example, extensions and garages feature flat roofs, as do
outdoor living spaces that have been built in the garden.
One of the main reasons is that flat roofs, which generally feature a
pitch of 10° and under, are not as thermally efficient as pitched roofs. This
makes them ideal for dry, warmer environments where heat retention is a lot
lower.
Planning restrictions in some towns will require flat roofing to be
installed. For example, if the use of a pitched roof is deemed to be too high
as it may obscure the view of surrounding residents and possibly block out
light, a flat roof is likely to be the recommended alternative.
A flat roof is usually the preferred choice for extensions likely to be
positioned nearby to an existing structure. There are also instances where a
new flat roof is installed to replace an outdated roof system. This is often
the case with corrugated tin roofs which are no longer allowed under current UK
building regulations.
There’s no such thing as “winging it” when it comes to
moving to a new office space. You have to start the planning process early,
divvying up who will be doing what, how they’ll be doing it, and when it will
be getting done. Otherwise, you may find yourself scrambling at the last
minute, and nobody wants to be in the office all night throwing staplers in a
box or trying to figure out how to get a dozen massive printers ready for
transport. In addition to planning how you’ll get everything ready for moving day,
you’ll also want to have a plan in place for where things will go when you
arrive at your new office space. Use a blueprint to figure out office and
common space layouts and figure out any new needs you might have. Figure that
you’ll probably have to set aside at least a few months to efficiently plan
your office relocation, and a couple of months to actually get everything set
up and ready to go. And don’t forget to plan ahead for your moving budget—it’s
important to know how much you have to spend.
Appoint a move manager
Even if you’re going to be dividing up the work, it’s still
important to have a designated move manager who can facilitate and follow up on
each step to ensure that things are progressing. Usually the best person for
this is an administrative assistant, but you may also choose to appoint someone
who has past experience with commercial relocations.
Do research to find the best moving company
We always recommend researching and getting quotes from at
least three professional moving companies before booking your move, but because
an office move can get very expensive, very fast, you’re better off looking at
a couple more than that. If you have the budget for it, plan to hire a full
service moving company—they’ll do all the packing for you, as well as the
loading, unloading, and unpacking. Ask around for recommendations of moving
companies that have experience with office relocations, since you’ll want to
make sure you only hire a company with a proven track record of success in this
area. To get the most accurate quote possible, have a representative from each
company come to your office and see the scope of the work. With jobs like this,
it’s not enough to describe what needs to be done over the phone.
Tips to Reduce Office Moving Stress
Start the Planning Process Early
Moving in September? Then start planning now! Give yourself
at least three months of time to put together a clear plan. Evaluate what needs
to be moved and decide what should be donated or securely eliminated. While many
charities do accept old office furniture, you can’t assume the charity will be
able to coordinate a last-minute pick up to coincide with your move. The same
goes for the secure disposal of electronic equipment. Advanced planning will
help streamline these logistics and eliminate unnecessary hiccups. Finally,
don’t keep employees in the dark about moving plans! Keep employees in the loop
as your plans unfold so they can manage workflow appropriately and support a
smooth transition process.
Purge Old Data and Recycle Electronics
Still have old employee laptops or phones lying around?
(Let’s face it, no one is going to fire up that BlackBerry from 2010 again!)
From old office phones to computers, it’s essential to dispose safely of these
products both to protect your company’s security and prevent harmful
environmental damage for e-waste. Removing personal data from devices isn’t as
simple as just deleting your old files. Do not trade, sell, donate or recycle
old electronics until you’ve wiped them clean. Consumer Electronics offers a
detailed guide for erasing personal data from computers, tablets and even old
BlackBerry phones. Once the data is fully purged, disposal options include
community recycling programs and donation programs (like Dell Reconnect and
World Computer Exchange). Some electronic companies like Best Buy and Amazon
also offer disposal and buy-back programs.
Plan for Coverage During the Move
For most small businesses, it’s simply not practical to
completely shut down for an extended move. At the most, you may be able to
close your doors for one business day and one weekend. If you primarily service
clients remotely, let customers know that you may be a bit slower returning
emails or answering phones during the moving period. If your employees are
helping out during the transition period with moving-related duties, consider
designating one employee as the emergency client contact. This ensures
uninterrupted client support without moving distractions.
Move the Non-essentials First
Conduct a thorough analysis of all parts of your office and
divide items between “essentials” and “non-essentials”. Reduce downtime by
moving non-essential items first to your new office space. Carefully label all
boxes and bins to minimize unpacking hassles. Equipment that’s necessary for
day-to-day operations should stay in place until moving day.
Group of young people moving in new office, holding boxes and stuff.
Must-Know Tips for a Smooth Move
Plan well in advance
If possible, start planning your move 4-6 months before you
actually want to make the transition in order to attend to all of the details
without becoming overburdened. Once you know you’re moving into a new office
scope out the space and decide on the layout, including where everything and
everyone will go. That will allow you to plan out what your needs are as far as
new office equipment goes, and give employees an opportunity to do their own
planning ahead for their new space. Create a map or floor plan and make it
available to both employees and movers so that everyone knows the plan moving
ahead.
Hire your moving company early
Since moving a corporate office involves a lot of equipment
and details, be sure to get a full estimate and hire a full-service moving
company 1-3 months ahead of time. Make sure they have experience with
commercial relocation and have them give you an on-site quote for the move — or
even better, get recommendations from others in your network who have moved
offices before. The movers should be held to the same professional standard as
anyone else you do business with.
Get the IT Team on board
Give your IT team three months advance notice to start
planning the transfer of all things technical: equipment, internet plans, phone
connections, etc. They will need to evaluate the new space for any upgrades
that need to be made, either to the infrastructure or to equipment being
brought to the new office. When relocating a corporate office you want your
landing to be as smooth as possible on the tech side, so do the legwork well in
advance.
Do a deep cleaning
Don’t bring things you don’t need! Shred all unnecessary
papers, get rid of office furniture that has been collecting dust and sell or
donate equipment that you won’t be needing anymore. Anything you choose to
donate can be used as a tax write-off, so check with your accountants to find
out what sort of paper trail you need to create as you purge.
TIPS TO HELP YOU ORGANIZE YOUR OFFICE MOVE
1. Decide if you will use full office relocation service
movers before creating your project plan. If you decide to work with a
full-service office mover, your mover (or move-management company) will handle
the majority of the corporate relocation for you. This saves you and your team
a lot of work and time! Once you select a relocation company, they should
provide you with the detailed plan and help you manage the process.
2. No matter what, your office relocation plan must include
the steps that your organization
will take to select the best office mover. The plan will need to include a
process to interview and hire a commercial mover with the experience, resources
and manpower required for an efficient office move.
3. Before signing a contract, make sure the moving company
you hire has insurance and get them to fax you a copy of it.
4. Inform employees of the upcoming move as early as
possible. If you are making a long-distance relocation, discuss relocation
packages. Keep employees informed throughout the process via regular emails,
posted notices and announcements during company meetings.
5. Determine the required space needed in the new office.
Plan for future growth if needed.
Tips to Make the Process Easier
1. Start early.
Depending on the size of your business and the number of
people you have helping you with your move, you’ll likely want to start the
moving and packing process as early as possible. In some cases, moving a
business involves more possessions than moving a home does, so the moving and
packing process will take considerably more time. Don’t be one of the many
business owners who underestimates the time it takes to move. Save yourself the
headache and optimize organization by starting early.
2. Invest in proper packing supplies.
Moving your business requires shuttling your commercial
possessions – many of which are quite expensive – from one location to another.
To keep your possessions organized (and in one piece), it’s important to invest
in proper packing supplies before beginning the moving and packing process.
Essential packing supplies for commercial moving include cardboard moving
boxes, bubble wrap or moving blankets, packing tape, clear zip-locked bags, and
pens or markers for labeling.
3. Don’t be afraid to donate.
For businesses of any size, moving presents an excellent
opportunity to downsize or upgrade. If you have possessions in your business
that serve little to no purpose – or if you have essential items that need to
be upgraded – your move is the perfect time to get rid of them. Old phones,
office furniture, printers, copiers, PCs and even stray office supplies are all
great candidates for donation. Not only does donation save you the hassle of
meticulously packing and moving these items, it may also earn you some extra
money through a tax write-off. If you do plan to write off your donation, be sure
to double-check which donation centers are registered charities.
Proper inspection of the house every year and proactive cautions are very important to get rid of this deadly mold problem. A home is an expensive asset of a person which can easily be damaged by a mold, there are 50 types of harmful molds that can destroy the health of a person in a few hours.
Point of Concern:
It is recommended to wear a mask or gloves at the time of
inspection, it helps to prevent the unnecessary contact and harmful inhaling.
Identification of mold
Mold problems are different in types according to the
palace;
It may be in different color like white, black, yellow or
brown.
Its texture may be like leather or cotton.
It carries a rotten or pungent odor.
MOLD, ALLERGEN AND PARTICULATES INSPECTION AND TESTING
Mold is a fungus that can be found everywhere, but it will
grow more aggressively in moist areas without proper ventilation, or on
surfaces that do not dry easily. Modern building materials and methods, such as
well insulated homes where outside air does not easily come into the house,
allow for mold growth.
While some types of fungi may be useful (to make
antibiotics, cheeses and beer), others are toxic and potentially harmful.
Increased awareness of sicknesses associated with mold and the concern of
insurance companies to insure property that is mold infested has made testing
for mold almost a necessity when buying or selling a home.
Mold may or may not be visible. When it is, it appears as a
surface stain or discoloration, or as a dark growth. At times, a musty smell is
present. Mold poses a health hazard when present in large quantities, called
colonies.
With our mold testing services we conduct an initial
non-intrusive visual inspection focused on the discovery of mold growth and moisture
intrusion – the leading causes of fungal contamination and mold growth.
Use of a moisture meter and thermo-imaging (as needed) to help locate areas of actively wet building materials.
Use of a temperature and humidity meter to determine the relative humidity in the areas inspected.
Outdoor cursory check, if the living areas inspected have outside walls.
Mold Inspections in San Diego, California
If your home smells moldy but you cannot see the mold
source, you might need a mold inspection to locate hidden mold. Also, you might
want a mold inspection if your San Diego home had water damage or if you (or
your tenants) are experiencing health problems. Mold could be hidden in many possible
places including:
Back side of dry wall, wallpaper, or paneling
Top side of ceiling tiles
Underside of carpets and pads
Inside walls around pipes that are leaking or have
condensation
On walls behind furniture where moisture has formed
Inside ductwork
Roof materials above ceiling tiles from roof leaks or insufficient insulation
Why You Must Need San Diego Mold Removal If Infested:
Mold removal in San Diego CA has recently become one of the most common service residents in San Diego are looking for. This further confirms the data, why San Diego ranks number #1 spot in the list of cities most affected by mold in California State. Mold causes serious health risks, especially to young children and this is why it becomes mandatory to get rid of that as soon as possible. A major mold infestation can ruin your home value—and your health! When you find mold growing in your home, sound the alarm and get rid of it fast. Delay can mean extensive and costly remediation and repairs. Without proper mold removal, the mold can go dormant until the next bit of moisture revives it. Mold Removal in San Diego should not be hurting your pockets. Getting quotes from various mold remediation companies in San Diego will take care of this problem without breaking your budget.
Air Quality in the Home
Indoor Air Quality testing Services we provide include;
Pre-remediation mold inspection and air and/or direct
sampling for mold in your homes IAQ.
Post-remediation clearance testing to ensure your remediated
areas are “clear and ready for occupation.”
VOC testing for the presence of Volatile Organic Compounds
in your homes IAQ.
Tobacco smoke testing for the presence of tobacco smoke in
your homes IAQ.
Formaldehyde testing for the presence of Formaldehyde in
your homes IAQ.
Radon testing for the presence of Radon in your homes IAQ.
IAQ Testing for the presence of Alergens in your homes IAQ.
Indoor Air Quality
Indoor Air Quality is just a fancy term for whether the air
in your home is safe to breathe. Whether
you are buying or selling, or if you are just interested in maintaining a
current residence, educating yourself on the air quality in your home will help
to ensure that the health and safety of all residents, as indoor air quality
can affect all living things inside the home.